Sharing the top yoga mats in different price points and for your different yoga needs.
As a yoga teacher, I have seen and practiced on quite a few yoga mats. Today I’m sharing my top picks for yoga mats based on what I use, whether you want to spend a lot or a little, and based on what your current yoga practice requires.
My favourite yoga mat:
Price: $108.00 CAN
Best for: all your yoga needs.
This yoga mat is definitely a higher price point, however, I have repurchased this mat after using my first one for about 10 years. That’s ten years of classes, both hot and regular temperature, as well as multiple mat cleanings. These mats hold up wel!! These two sided mats offer a smooth side and textured side, so you’re covered for both Hot and regular temperature yoga classes. I find the smooth rubber side provides enough grip while not allowing you to “stick”, but it would be too slippery in a hot class with all the sweat - which is where the textured side comes in. The 5mm thickness provides adequate cushioning for the joints and points of contact with the floor. I have a beautiful sage green coloured one with the marbled design and besides the functionality, it looks really pretty. The one downside is these mats are a bit heavier to cart around, so if you’re someone who bikes to classes with your mat on your back, this would likely feel cumbersome. Otherwise, for durability, use during classes, and overall appearance, I rate this a 10/10.
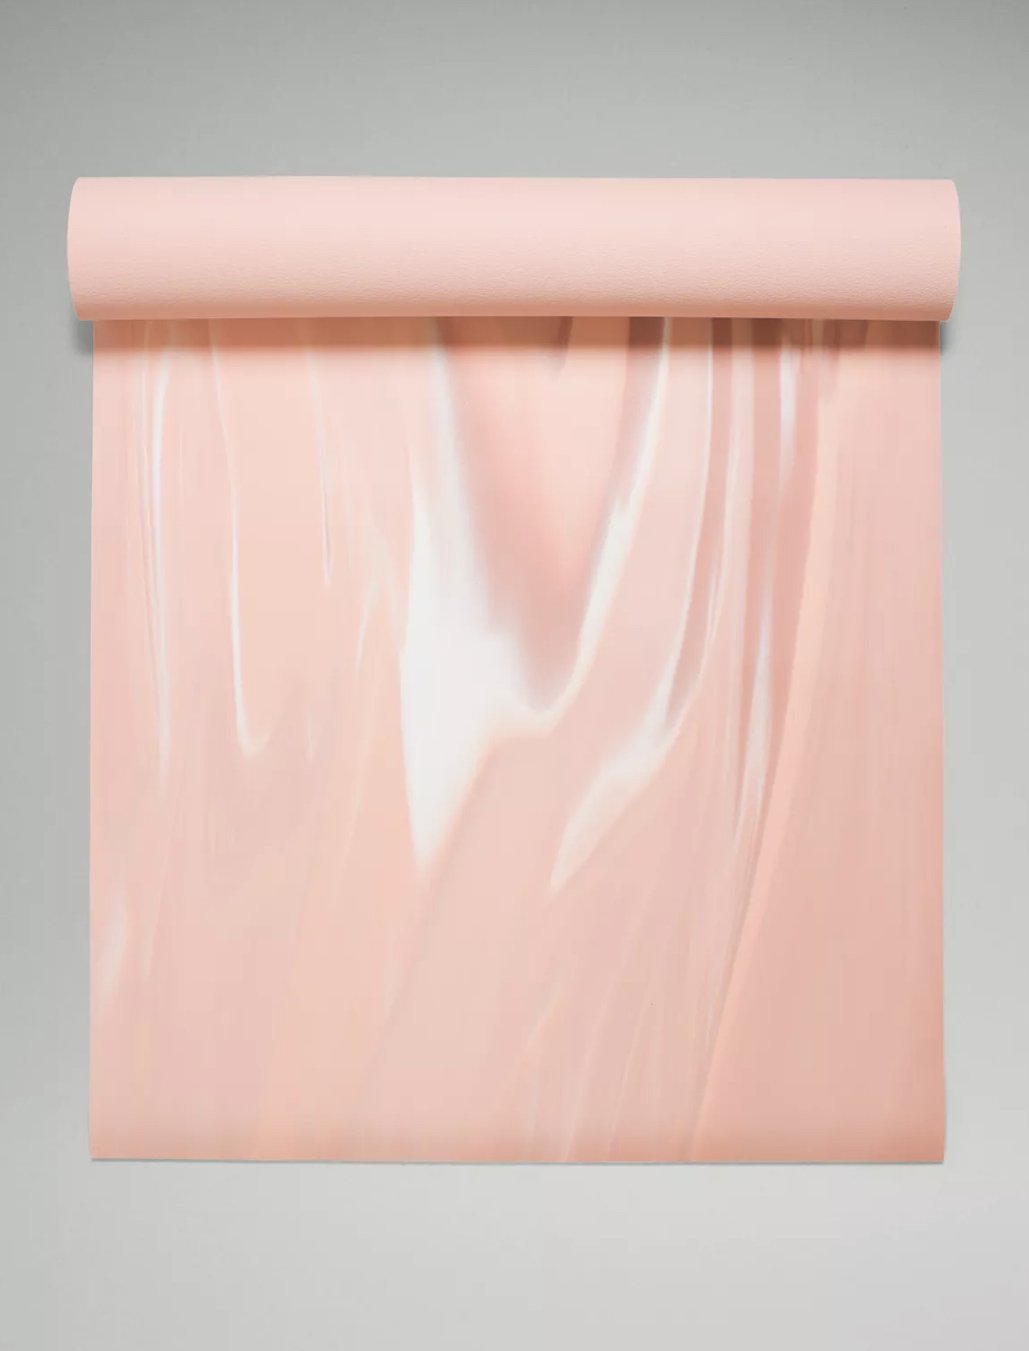
Image from Lululemon.com
If you’re looking for something similar with a lesser price tag, this mat from Amazon looks similar and has great reviews. (Here’s the Amazon link for US Residents!)
As an Amazon associate I earn commission on qualifying purchases.
My second favourite mat:
Giaim Premium print yoga mat (Links to Amazon Canada)
(Amazon link for US residents)
Price: $29.98 and up
Best for: all your yoga needs.
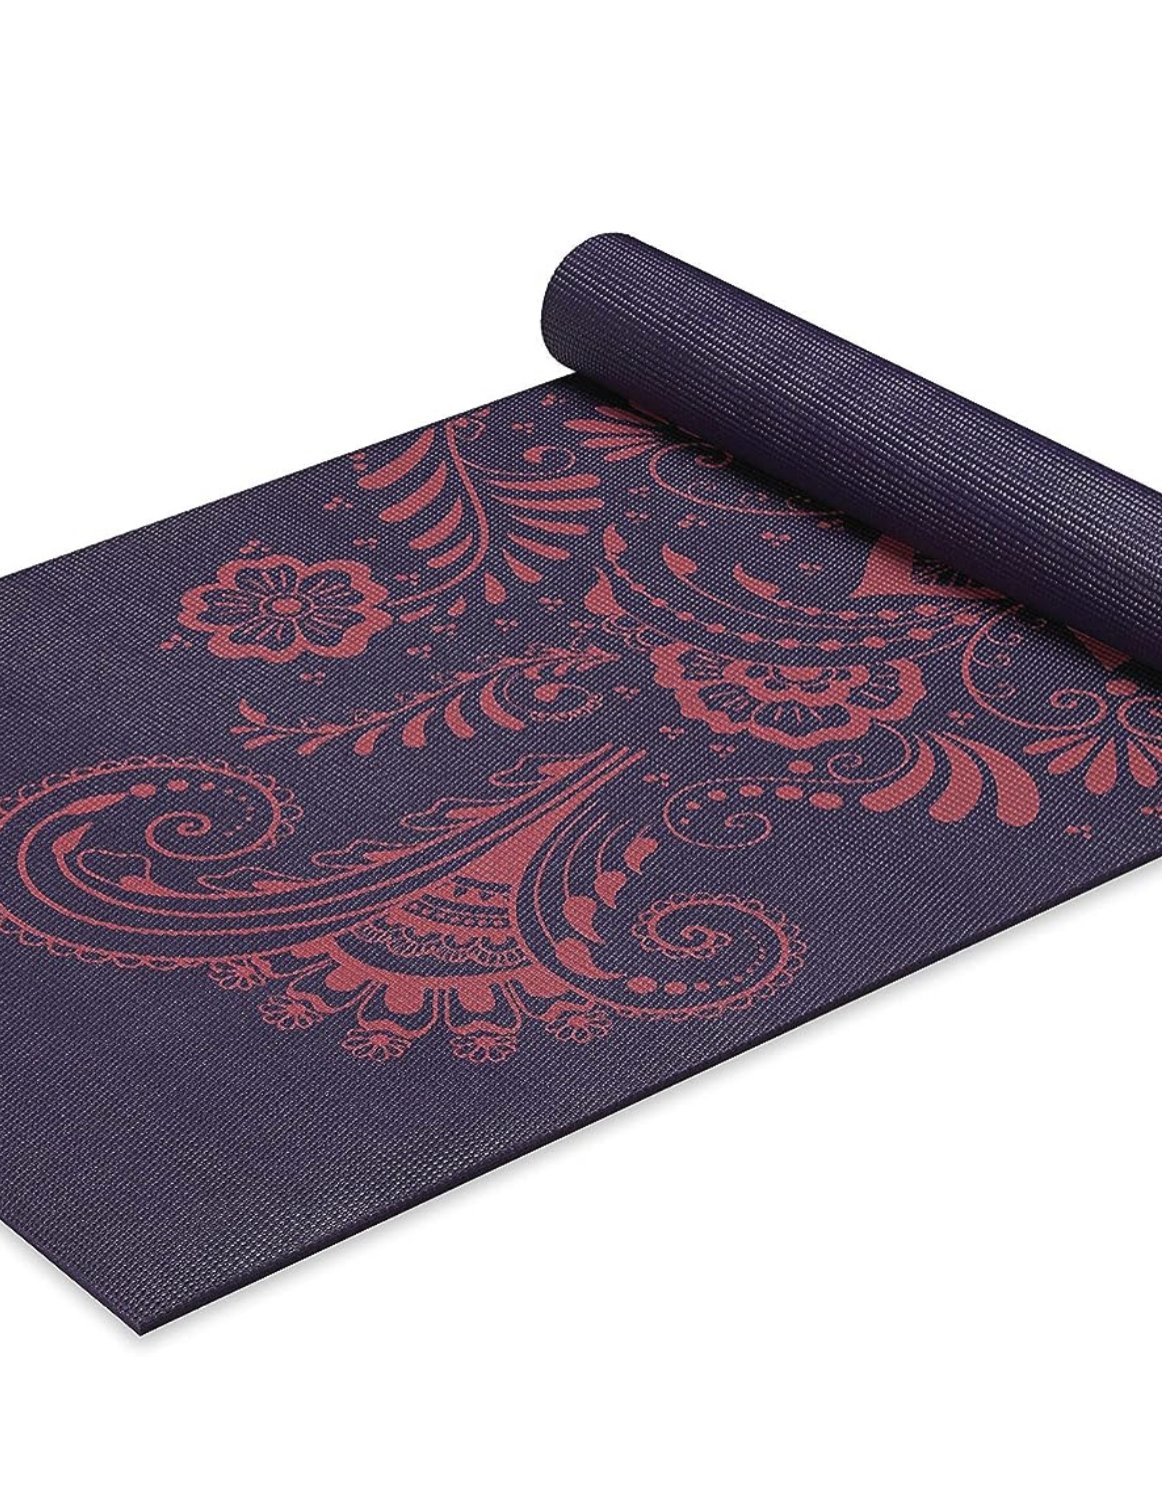
Image from Amazon.com
I bought three of these beautiful mats to offer as rentals for my students and ended up using them myself. I found the design so appealing and the texture and thickness was adequate, although compared to the Lululemon rubber mat, not as padded or structured. These mats were easy to roll, light to carry around and held up decently to multiple classes and cleans. This type of mat will defiitely start to show wear and tear sooner than the rubber mats above, but at a fraction of the cost, you can likely replace this one every year or two and not break the bank. For durability, use in class, and overall appearance, I rate this a 8/10.
Best yoga mat for “bad” knees
Amazon Basics 1/2 Inch extra thick exercise mat (Links to Amazon Canada)
(Amazon link for US Residents)
Price: $39.68 CAN
Best for: anyone with sensitive knees or knee concerns, or anyone who likes extra padding under their body when lying on the ground.
I personally haven’t used an extra thick mat, but for my multiple students who need extra padding under the knees or other pressure point areas, these mats are the way to go. The only issue can be with balance since the thickness and extra cushion can cause you to be a bit wobbly. I have recommended thick mats to many students and always receive positive feedback.

Image from Amazon.com
Finding the right mat can make all the difference in your yoga experience, so make sure you take the time to find the one that suits your needs the best.


