balance

Real Life: 5 Brutal Truth's about Being a Yoga Teacher

Real Life: 5 Brutal Truth's about Being a Yoga Teacher

You have just completed your 200 hour Teacher Training and received your certificate. You are officially a Yoga teacher, and you can't wait to hit the ground running (or sun saluting as it may be). Before you take the leap into becoming a Full-Time Yoga teacher, I want to pass along some of the lessons (ie: Brutal Truth's) I've learned along my journey, including some things I wish I had learned sooner. 

Disclaimer: These brutal truth's include money talk but I am not implying that money/income etc. is the end all, be all when it comes to deciding on a profession. 

Yoga Pose: Eagle Pose Part Two - Lower Body

I'm Baaaack!!! I must say that my vacation really worked to relax and re-charge my system! I am very excited to bring the second part of the Eagle Pose tutorial to you today - the lower body. As I shared in Part 1 (check it out here if you haven't already), Eagle pose can be very tricky. Today I'm going to show you how you can work progressively to move into this position, and provide some modifications to help you along the way. Keep reading for tips on moving into this yoga pose and watch the video at the end for some visual cues! 

Pose Difficulty: Beginner - Intermediate

Step One: Warm up your legs with Chair Pose (aka Utkatasana). Chair pose is the first step to moving into the pose so spend some time warming up those Quadriceps with a few repetitions of chair. I like to incorporate it into a flow with some forward bends to equally stretch and strengthen the muscles (see video for a warm up activity). 

Step Two: From your chair pose, keep your Left foot planted, and lift your Right foot off the floor. Keeping your knees bent, cross your Right leg over the Left, like you would if you were sitting in a chair. From here you have a few options:

Option 1: Bring your Right toes to a block (or the floor if the foot reaches) to help keep your balance (best option for Beginners or anyone who struggles with balance)

Option 2: Keep your Right foot in the air and work on your balance here. 

Option 3: Wrap your Right shin, ankle and foot behind the Left shin (see video). 

Step Three: Breathe and feel!

- No matter which above option you chose try and keep the hips level and in one line. 

- Keep bending the standing leg knee and grounding down through the standing leg foot. 

- Keep you gaze soft and steady on the floor in front of your to help with your balance.

- Try to bring your knees and elbow into the mid line of the body.

Try staying here for 5 - 10 deep breaths before untangling your arms and legs - giving everything a good shake out - and then moving to the other side! 

Note: In this pose, you always work with opposite arm and leg positions, so if the RIGHT ARM is UNDER the Left, the RIGHT LEG is OVER the Left.

PS...sorry for the video quality, it's not my best. I wont be using this camera again! 

Yoga Student Question: Why can't I Balance??

Yoga Student Question: Why can't I Balance??

When I teach balancing postures - Tree pose, Eagle Pose, Warrior 3 - I usually say at some point in the practice "If you fall over, just have a laugh and keep trying - it's just Yoga". In my experience as a Yoga teacher, I see the most frustration and stress around poses that involve balancing on one foot. If people cannot stay balanced, they get very discouraged and stressed and it can effect the rest of their practice as they carry those feelings into the next poses. So, today I wanted to address the question of "why the heck can't I balance on one foot?!" here on the blog. 

Yoga Pose: Warrior 3

Yoga Pose: Warrior 3

Warrior 3 - Virabhadrasana 3 - is perhaps the most challenging of all the Warriors as it requires strength, balance and flexibility. This pose provides many benefits to it's practitioner, including strengthening the legs, feet and ankles, strengthening the core muscles, opening and toning the shoulder muscles, and helping to improve balance. Keep reading to learn how to move into this pose. Since balancing in this pose can be especially difficult for beginners, I have also included the supported version of this pose as well. Enjoy! 

Yoga Pose: Tree Pose

tree-pose.jpg

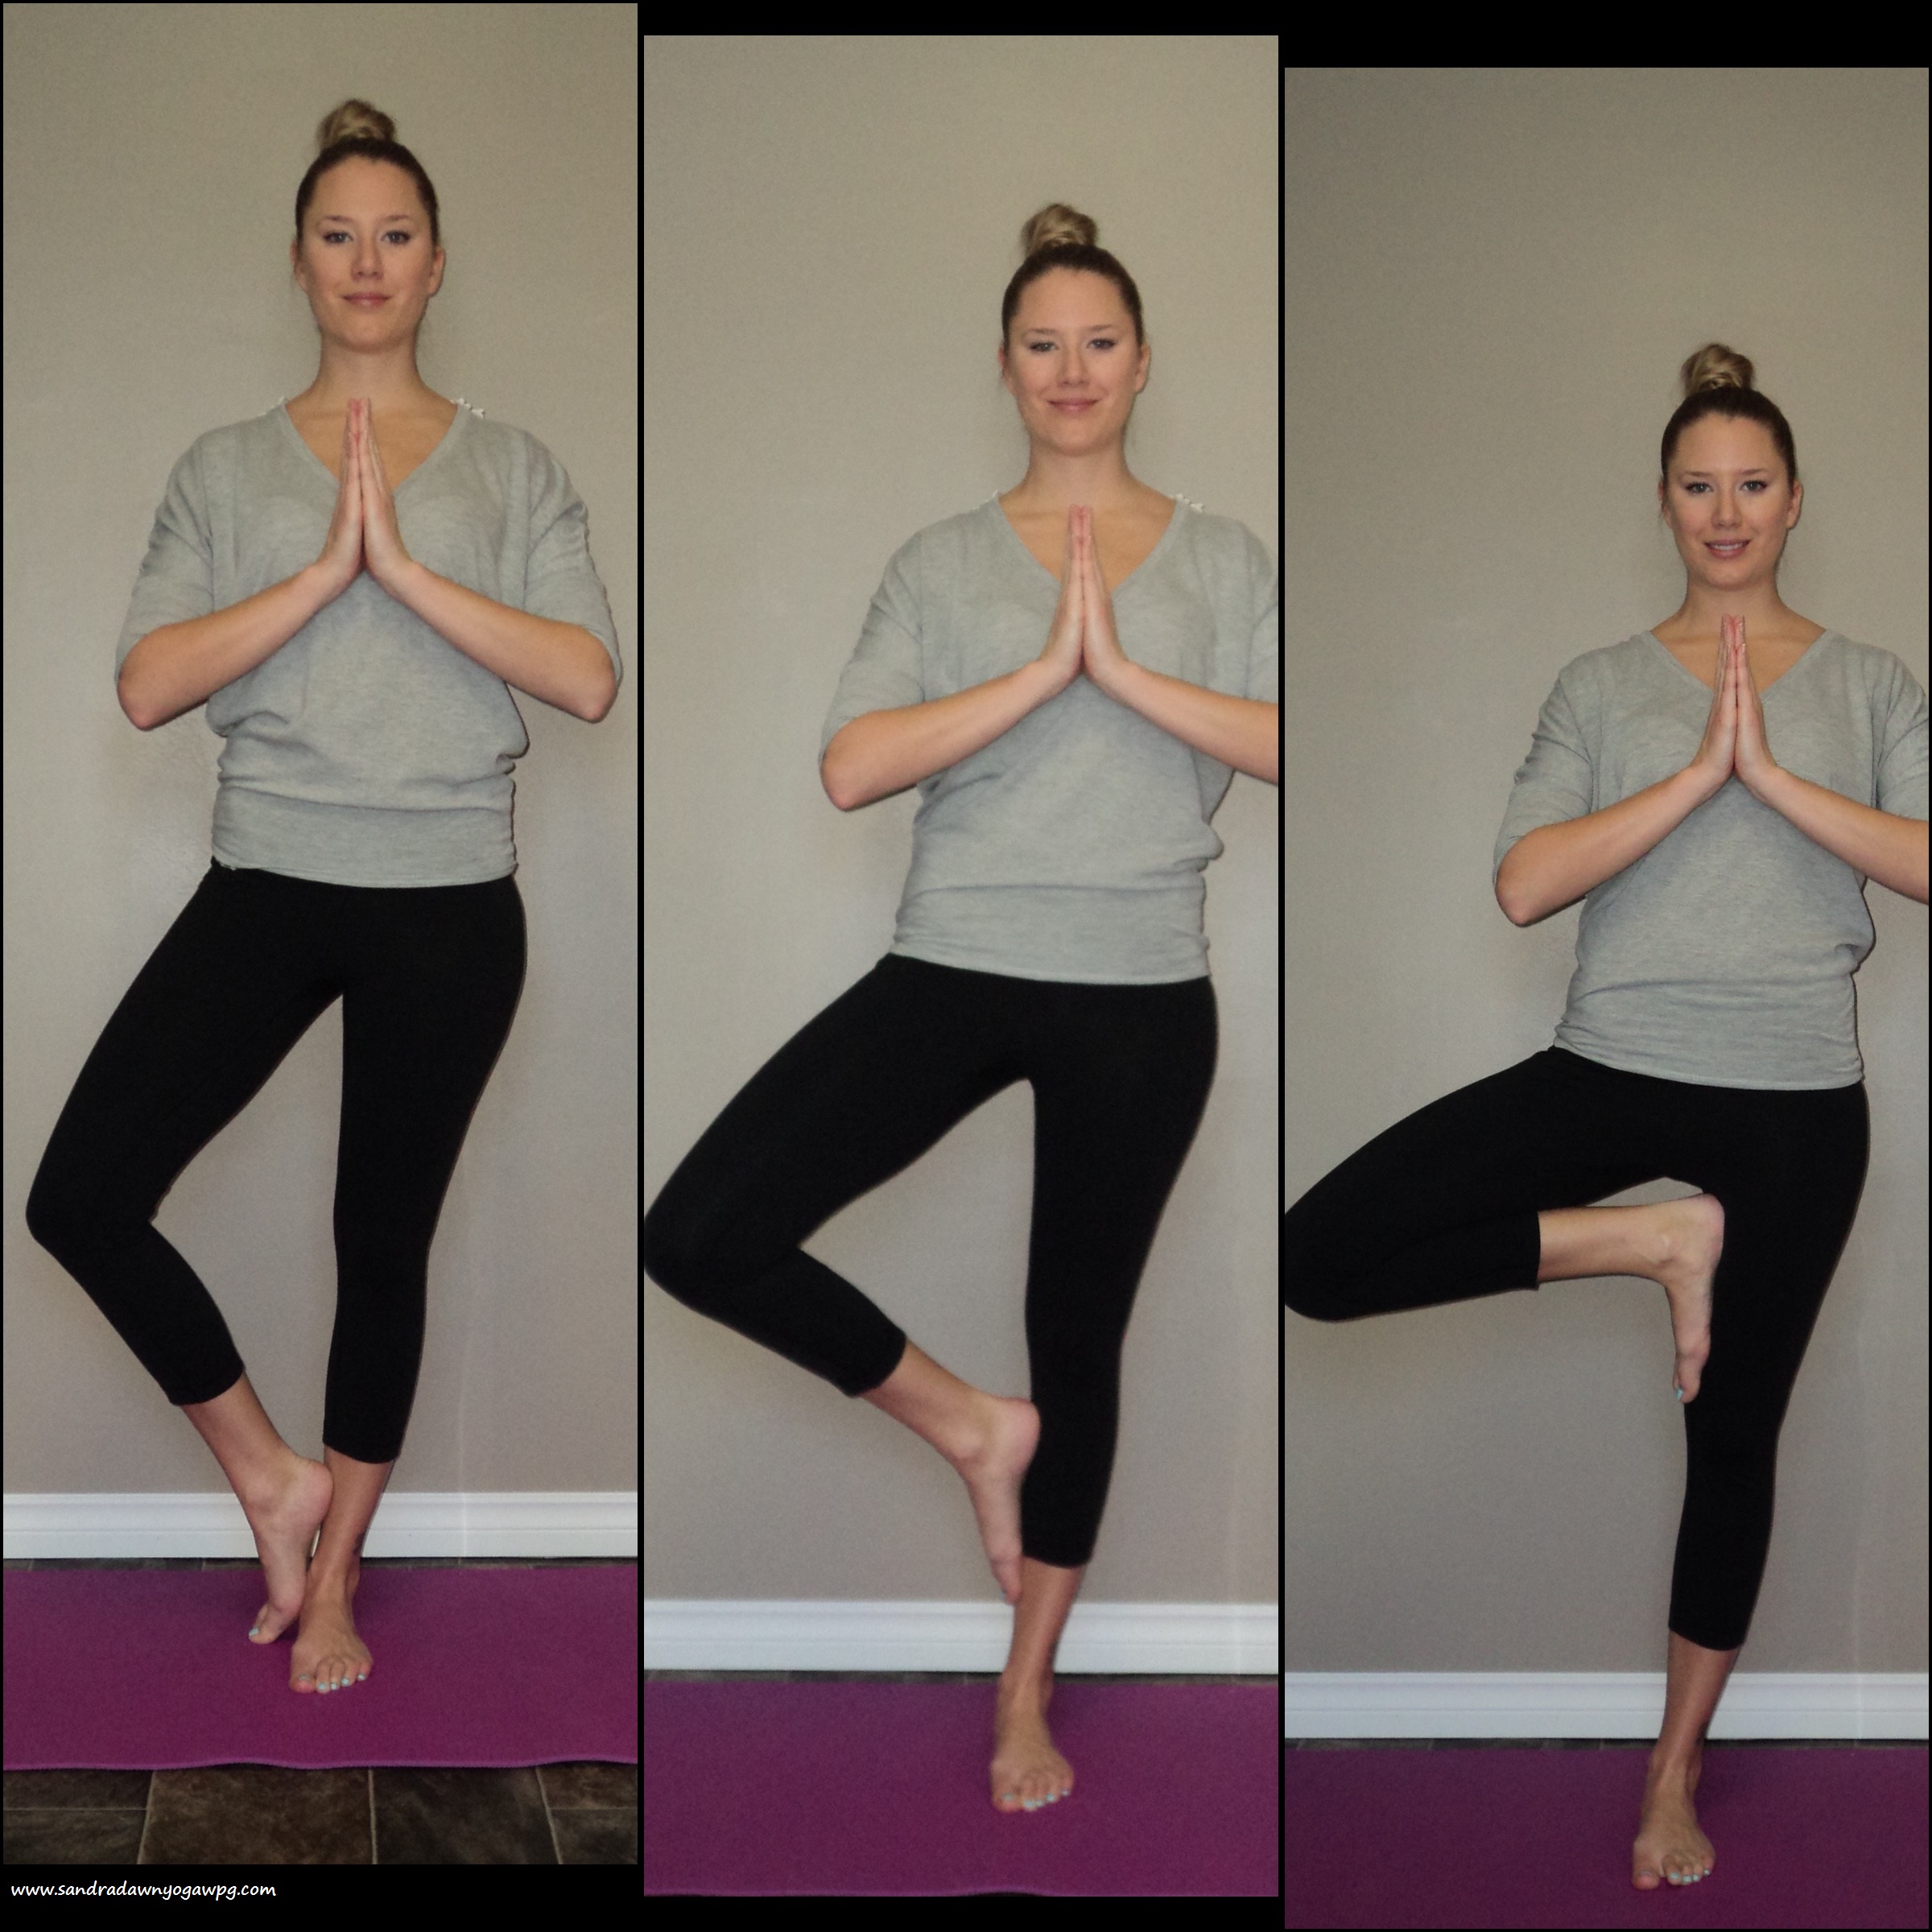
Tree Pose - Vrksasana - is my favourite of the balancing poses. It really allows me to focus on grounding into the earth (or rooting - since we are a tree ;)) while finding my balance and lengthening through the spine and upper body. Of course, there are lots of benefits to this pose, including increased balance and strengthening of the legs, feet and ankles. There are three ways you can practice Tree pose - as pictured above - you can keep the toes resting into the ground to help with balance, you can bring the foot to the inner calf, or up into the inner thigh. Work where you are at! Keep reading for more details on how to move into this pose and find a helpful visual at the end of this post. 

Difficulty Level: Beginner

Step One: Begin by standing in Tadasana, keeping your hands on your hips, focus on grounding through the four corners of your Left foot into the mat. You may want to try picking up the Right foot just to test the balance. 

Step Two: Bend the Right knee, either placing the foot to the Left inner calf, thigh, or keeping the toes onto the mat for extra support. IMPORTANT: Please do not place the foot on the knee joint.

As you bend the knee, you are externally rotating the hip joint - so the knee is now pointing away from the Left Leg. As the Right foot presses into the Left leg, the Left leg presses back into the foot. 

Step Three: Notice where your hips are in space. Often the hip on the bent leg lifts up in this pose - we want the hips to be level. Keeping the hands on the hips, try bringing the hip bones into one line. 

Step Four: Breathe and Balance. Try staying her for 10 breaths - remember, it's ok if you fall out, just try your best! 

Palms can join at Heart center.

Shoulders release down and away from the ears.

Spine is long, reaching through the crown of the head as the foot continues to ground you to the earth. 

Perhaps you can raise the arms, stretching and lengthening through the upper body, reaching the finger tips to the sky. 

Step Five: To release, bring the hands back to the hips and carefully step the right foot to the floor. Now try on the other side!